Virtual private network (VPN) is becoming more popular each year. More and more people are choosing to use a VPN as cyberattacks become more of a problem on both personal and business computers, mobile devices, and tablets.
Also, VPNs are great for streaming your favorite shows or improving your internet connection. If you’ve decided to use a VPN for enhanced privacy, you are probably wondering how to install a VPN on your router.
Installing a VPN doesn’t have to be complicated. Check out this step-by-step guide to help you get started.
Why Install VPN on Your Router?
Having a VPN is a great way to protect yourself against cyber attacks. As of 2022, 79% of people in the US used a VPN at home and 63% at work. VPN usage has increased significantly in the last few years, and the most cited reason for people switching to a VPN is security.
You can use a VPN to protect yourself while using Wi-fi in public locations that may or may not have layers of protection attached to their hotspots. You can also use VPN to allow you access to your favorite streaming services when you are traveling abroad.
VPN can also open up a large library of content exclusive to other countries that you can access by hopping onto a server in that country. VPNs also help you to bypass internet service provider’s bandwidth restrictions, so that you can enjoy higher bandwidths.
With all of these reasons, it’s easy to see why you’d want to install VPN on your router.
Your first instinct may be to find a free VPN provider and go ahead and install them right away. But, before you get carried away, it is important to note that free VPNs are less secure and aren’t as reliable as paid services. You also can’t always unblock all of the content you are looking for with a free VPN.
As you research VPN clients, try to choose one that offers reliable service, fast speeds, privacy and security, and lots of unblock capabilities at an affordable price. You also want to make sure that they specify, especially if you aren’t a tech expert, that they have some VPN install support. This will make getting your VPN client established on your router even easier.
Research your options thoroughly. Some VPN clients hit you with long commitments or hidden fees. Others may have an affordable price but slow speeds. Once you’ve weighed your options and chosen a VPN service, it’s time to install your VPN on your router.
The Right Router
You are excited to watch your favorite shows, maybe even unlock some new geo-specific content on your favorite apps like Netflix, Apple TV, Disney +, or Hulu. You’re also looking to use a VPN to speed up your bandwidth so you can get the most out of your Smart TV and game consoles.
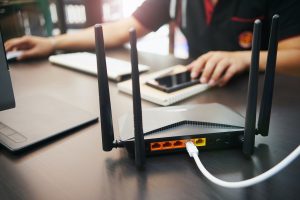
Before you get too excited, it is important to understand that most modems and Wi-Fi routers do not support VPN. Many VPN service providers make installing their VPN easy and manageable. However, many of these have approved lists of compatible routers.
So, if you’re router doesn’t match your VPN provider’s list, you may find yourself in a bit of a pickle. You could simply buy an approved router, but routers can get a little pricey.
Alternatively, some routers are connected to VPN services via OpenVPN or Point-to-Point Tunneling Protocol (PPTP). VPN-compatible routers aren’t mainstream, so choosing one often means getting a higher-end VPN router. This can also be expensive.
But, if you want to skip installing configuration files and making your router compatible, you could try purchasing one from Flashrouters or Sabai Technology.
If neither of these options works for you, you may wonder if there is a way to get your existing router to work with your chosen VPN client. Most people in this situation will search for firmware that will either support Open VPN or your VPN client. DD-WRT and Tomato are two firmware options for people using Broadcom-based routers.
However, if you choose to go the DD-WRT route, you could irreversibly damage your router, if you don’t install the firmware correctly or void the router’s warranty. So, be sure to find good resources and do plenty of research before beginning the configuration process.
Tutorial for Installing VPN on Your Router
If you’ve checked to see if your router is VPN-compatible and have decided you don’t want to buy a new router, follow the instructions below to configure your existing router to your VPN server.
Step 1: Determine your IP Address
An Internet Protocol (IP) Address is like your computer’s name. It is generally represented by a set of unique characters. IP addresses show your location. It also allows your computer to be able to communicate with other computers. You will need to figure out your router’s IP address, whether you are using a Linksys, Netgear, Asus router, or another model, the steps should be fairly similar.
To find your IP address for your router or internet access point on Microsoft Windows 10 (other operating systems such as Mac iOS should follow comparable directions), select the Start menu and type “Command Prompt.” Press Enter. This will bring up a black screen that will have your computer brand’s name and operating system. There will be a flashing curser to indicate you to type in a command.
Next, type in “ipconfig.” Press Enter. A screen with lots of numbers and letters should pop up. This will include a list of different address numbers associated with your computer.
Look beside “Default Gateway” to find your router’s IP Address. The number should look like a series of 3 numbers period 3 numbers period 1 number period 1 number period (000.000.0.0). There may be other numbers and symbols above this address.
Step 2: Router Configuration
Open your default browser. Type your IP address as the URL with http:// in front of it. This should bring you to a login prompt. You can put in your router’s username and password at this time.
If you don’t know your password, it could still be the default password from the initial router setup. Check on your router’s website, in your owner’s manual, or contact your router company to get it. If all else fails, use those resources to reset your login information.
If you type in the IP address as your URL and you get a page that says “This site can’t be reached,” you may need to unblock this page through your firewall or antivirus settings to allow you to connect.
Once you have access to your router’s settings, you’ll want to find the tab that allows a firmware update. This is usually under an administration or maintenance tab, but if you are having trouble finding it, search for instructions on your router’s website.
Step 3: Install Firmware
Next, you’ll want to install a DD-WRT. This is a popular router firmware installed to make a router’s performance more efficient, add new features, and improve speeds. DD-WRT can be installed on most routers, but you should check for compatibility with your specific router.
By installing this firmware, you will be giving your router the capability of supporting VPN protocols such as Open VPN client and WireGuard.
However, be sure to do your research and make sure that your router is supported. If it is not, you could make your router inoperable. Also, be sure to do this on a day when you expect your power to be uninterrupted. Make sure your ethernet cable is securely in your router and that it has no chance of being tripped on or unplugged at any point during the installation. A power outage could interrupt the installation and also render your router inoperable.
Usually, DD-WRT firmware installs without a hitch, but it’s important to be conscientious of the risks. Take precautions, and this should go smoothly.
To locate the firmware, go to the DD-WRT website, go under the “Support” tab, and click “Router Database.” This will lead you to a search bar. Type in your router model and then navigate to the correct device. Click on the name of your router.
There will be some links you can click under “additional information” about the files. Be sure to check out the install procedure wikis before proceeding. Then, follow the procedures to begin your firmware installation.
Upload the bin file and let it run. Once the files have been downloaded, your router will be compatible with OpenVPN.
Step 4: Adjust Your Settings
After the download is complete, you should have a new default IP address for your DD-WRT install. Type in that default address into the URL just as you did before. You should get a screen prompt to reset your username and password.
This will take you into your router’s new and improved router configuration process. For those with a lot of knowledge or businesses needing more advanced options, you can customize your settings to your unique needs.
However, if you are just using this connection for a basic VPN connection, you probably don’t need to get into all of that other stuff. Your main objective is to make sure that your Wi-fi network is running smoothly and your router is functioning the way you want it. Some routers will need you to configure your WAN settings, which is basically just information about your internet service provider (ISP).
Step 5: Connect to Your VPN
To connect to your VPN client, you’ll need to navigate to the VPN tab. Each VPN service will be slightly different, so you should refer to your VPN provider’s instructions. Popular VPN choices such as ExpressVPN, SurfShark, and NordVPN offer setup help.
Some VPN providers will have their own VPN software for you to download, while others will use the Open VPN client. Once you get to this point, you can just follow the instructions given by your VPN client to complete the VPN setup.
Once you get your VPN setup, you can go back into the setting to further customize your VPN connection. You may want to turn on VPN tunneling to improve your internet connection. This is also where you would change the country or location setting.
You should be able to connect to your VPN like you would your regular Wi-fi network after this on your Android, Mac, Linux, iOS, or other operating system.
Choose the Best VPN Service
If you are still shopping around for the best VPN for your streaming services, better bandwidth, and security needs, consider SekurVPN. Our high-speed servers give you optimal access to your favorite entertainment apps. We have proprietary technology that is a 100% company-owned infrastructure with no open source.
For cybersecurity, we have military-grade advanced encryption with different layers of security to protect your internet traffic and a Swiss IP address to keep you anonymous online and allow you to navigate securely while being protected by Swiss privacy laws.
Our service is easy to use, set up, download, and tap, so you don’t have to worry about the hassle of complicated VPN configuration. You’ll also have a single license for all of your connected devices.
Try out Sekur free for 7 days to see for yourself why this is an excellent choice for your business or home network.
Conclusion
Using a VPN can add an extra layer of security to your internet activity. It can also give you access to more streaming content and speed up your bandwidth. Even if you aren’t tech-savvy, you can install a VPN on your router.
The key takeaways from this tutorial are to make sure you have a router that is compatible with VPN, if it is not, install firmware such as DD-WRT, and then, use your VPN client’s instructions to complete the setup.
Once you’ve got your VPN up and running, you’ll be amazed at how much better your streaming experience will be. Plus, you can enjoy peace of mind knowing you have an extra layer of security against cyber attacks.